How do I add a form to my activity / opportunity?
Create forms. Link forms. Adding files.
This article first explains what a form is and where you can find it, then we show you how to create a form, then how to add it to an activity / opportunity.
Forms can be added to activities / opportunities to gather more information about the applicant / volunteer.
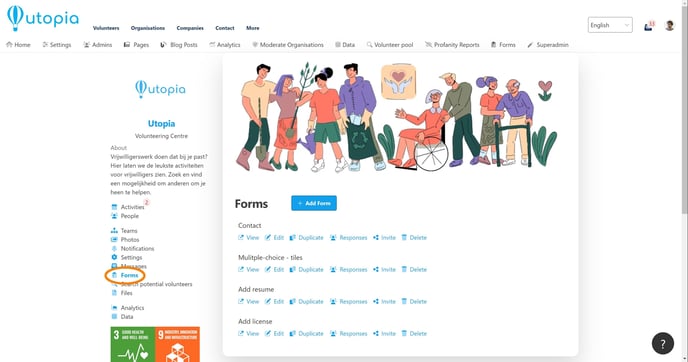
All forms can be found on the organization page (see the image below). This is also the only place where you can delete them. So you can remove a form from an activity / opportunity without losing it. This is also where you can download the data of users / volunteers who have applied for an activity / opportunity.
TIP: You can use one form for multiple activities / opportunities.
Where do I create a form?
There are two ways to create a form.
Via the organisation page:
-
Click on your profile icon
-
Go to your organisation page
-
Click on "Forms" in the menu
-
Click on the "Add from" button
When creating an activity / opportunity:
-
Create an activity / opportunity
-
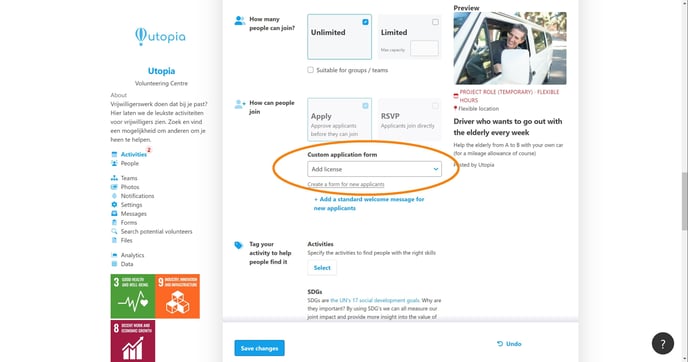
Go to the 'How can people join' section
-
Click on "Create a form for new applicants" under the field for "Custom application form", a new tab will open
-
Click on "Add form"
How do I create a form?
Give a title to your form and determine whether the form can be completed by just anyone or only by logged in users (this affects which fields you can use, see below).
Then select the contact person who should receive the answers. NOTE: if you leave this box empty, no one will be notified when the form has been completed. This does not apply to forms that are linked to an activity / opportunity, the answers are attached to normal applications.
You can then choose to set up an automatic reply that will be sent to the user after completing the form. This message will not be sent if a form is linked to an activity / opportunity.
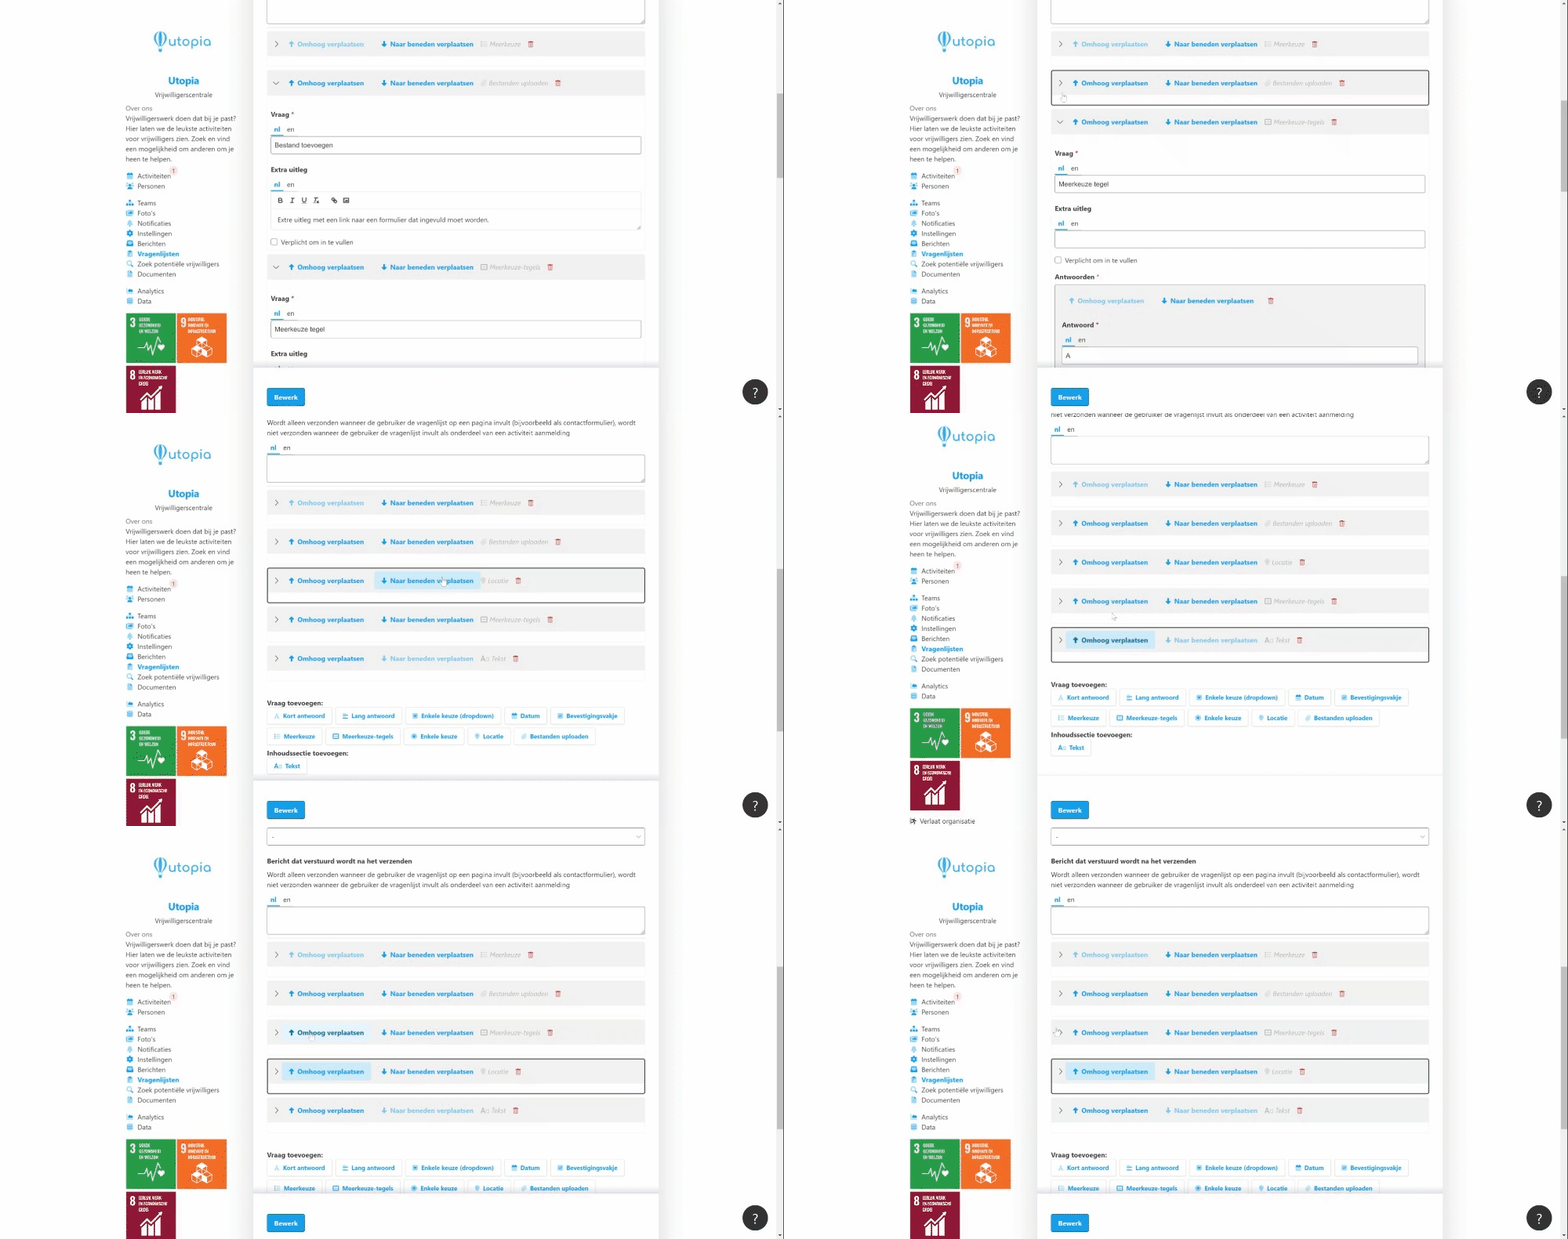
Now you can get started with the content. You can indicate per question whether this is a mandatory question and/or add extra instructions if necessary. You can change the order of the questions by clicking the up arrow (↑) or down arrow (↓).
You can choose from 10 different types of questions:
-
Short answer - open question with room for short answers
-
Long answer - open question with room for long answers
-
Single choice - select one answer from a list
-
Single choice (dropdown) - select one answer from a list using a field that expands so that the questionnaire remains shorter / clearer when you have a question with many answers.
-
Date - select a date
-
Checkbox - check if applicable
-
Multiple choice - select multiple answers from a simple list
-
Multiple choice tiles - select multiple answers using tiles that provide space for adding an icon and a description if the choices could use some explanation
-
Location - this field is linked to our map provider's database which allows you to search and add your location
-
File upload* - let someone upload a file of max. 5MB; there is space to add text with, for example, a link to a form
* This is due to only possible if the form can only be used by logged in users for security reasons. 'Allow non-logged in users to view and submit this form' should therefore not be checked.
TIP: Explain your form by adding 'Content sections'. These are rich text fields that allow for basic styling and to which you can also add images and/or videos from Youtube or Vimeo.
How do I add a form to an activity / opportunity?
Follow the next steps to add a form to your activity / opportunity:
-
Create or edit an activity / opportunity
-
Go to the 'How can people join' section
-
Click on the field under "Custom application form"
-
Select the correct form
Also see: How do I download the data of users / volunteers who have applied for an activity / opportunity?
You might also find this interesting
-
Do you want to know how to increase the reach of your opportunity? You can read it here.


